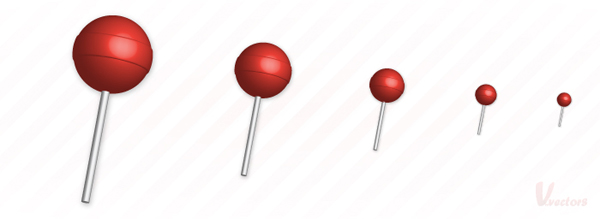
In the following tutorial you will learn to create a lollipop icon. By using some simple shapes and the Distort & Transform function, you will see just how easy it is to make a great looking icon.
Step 1
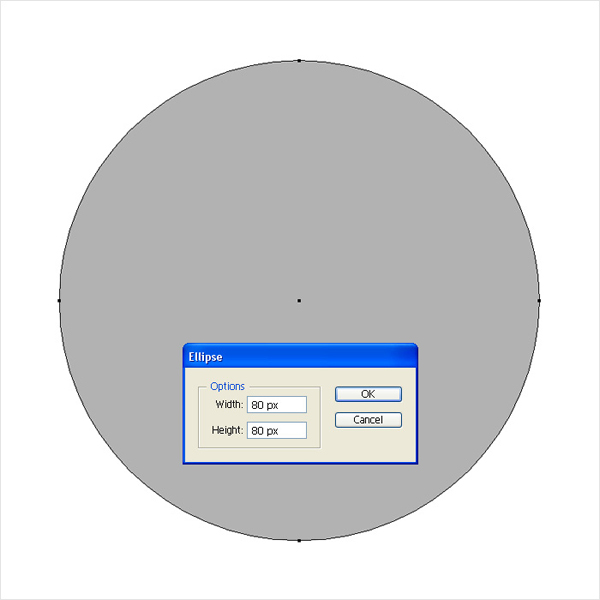
Create a 255 by 255px document. Pick the Ellipse Tool (L) and click on your artboard. Enter 80 for both width and height then click OK. You will get a 80 by 80px shape. Fill it with any color.
Step 2
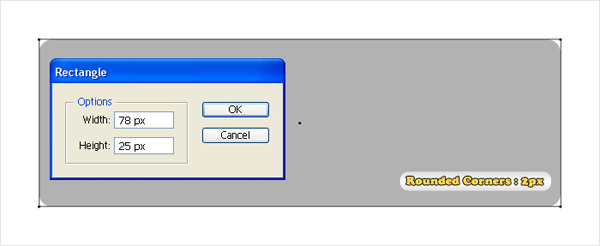
Pick the Rectangle Tool (M) and click on your artboard again. Enter 78 in the width box and 25 in the height box then click OK. Select the resulting rectangle and go to Effect > Stylize > Rounded Corners. Enter a 2px Radius and click OK.
Step 3
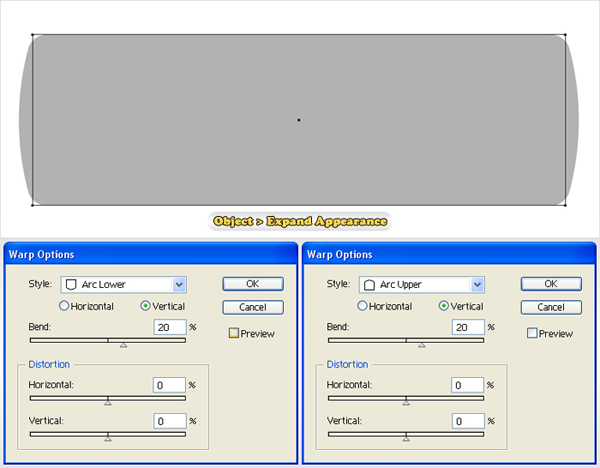
Select the shape made in the previous step. Go to Effect > Warp > Arc Lower, enter the data shown below then click OK. Reselect this shape, then go to Effect > Warp > Arc Upper. Enter the data shown below, click OK then go to Object > Expand Appearance.
Step 4
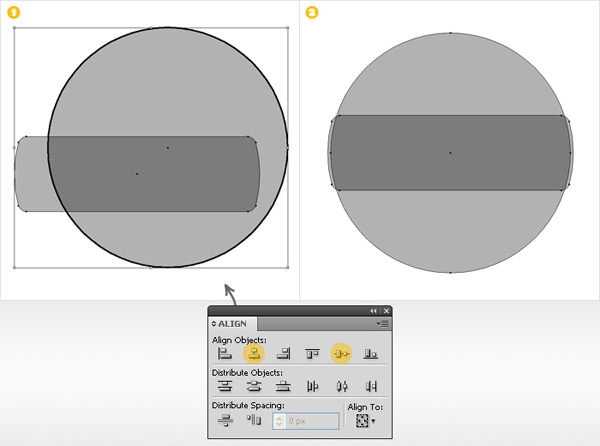
Select the shapes created so far. Pick the Selection Tool (V) and click on the border of the circle. It should become emphasized. Now, open the Align panel (Window > Align) and click on the Horizontal Align Center and Vertical Align Center buttons.
Step 5
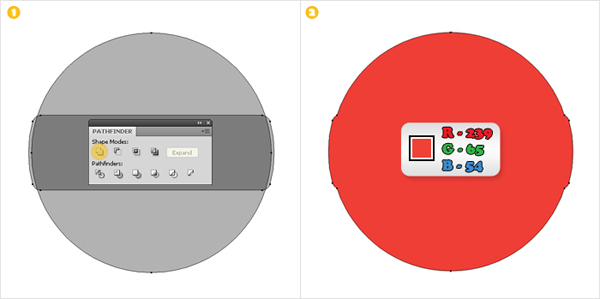
Reselect the shapes created so far and click on the Unite button from the Pathfinder panel. Fill the resulting shape with R = 239 G = 65 B = 54.
Step 6
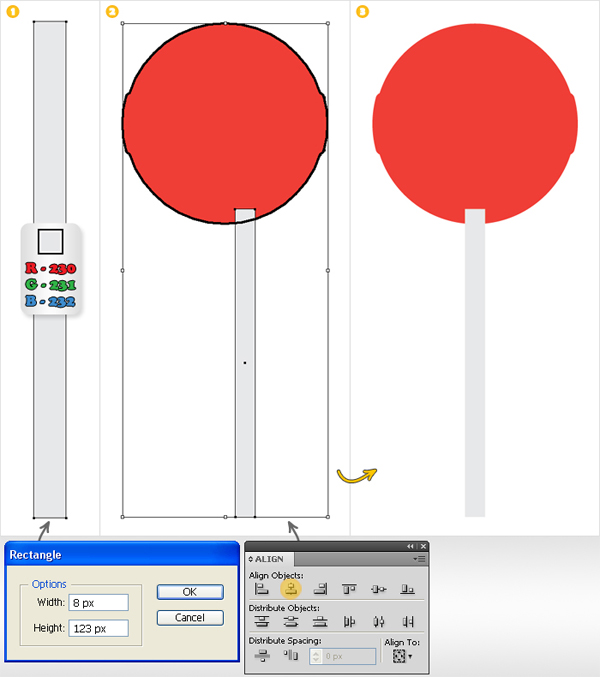
Pick the Rectangle Tool (M), create an 8 by 123px shape and fill it with R = 230 G = 231 B = 232. Select this rectangle along with the shape made in the previous step then pick the Selection Tool (V). Click on the border of the red shape (again, it should get emphasized) then click on the Horizontal Align Center button from the Align panel. Now, your two shapes should be placed as shown in the final image.
Step 7
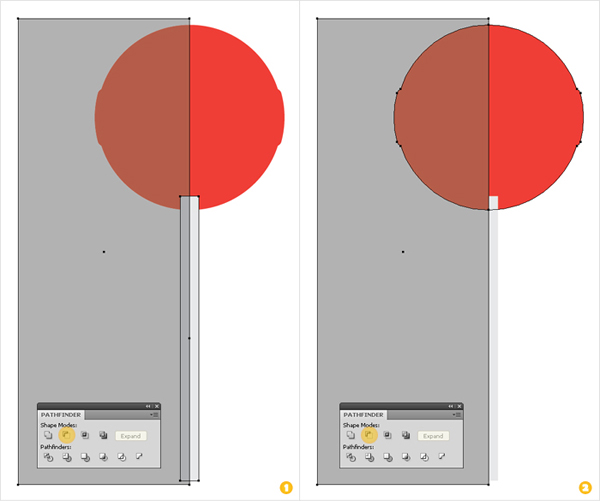
Pick the Rectangle Tool (M) and draw a shape like the grey one shown in the following images. It should cover the left half of the existing shapes. Duplicate it (Control + C > Control + F). Select one of the grey shapes along with the thin, tall rectangle and click on the Minus Front button from the Pathfinder panel. Now, select the other grey shape along with the red shape and click on the Minus Front button from the Pathfinder panel.
Step 8
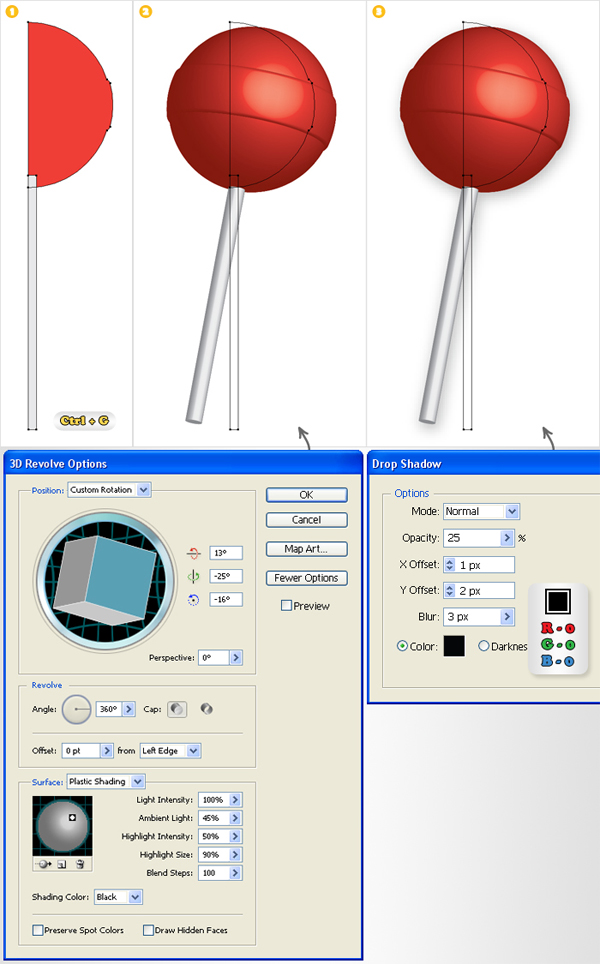
Select the two shapes made in the previous step and group them (Control + G). Select this group and go to Effect > 3D > Revolve. Click on the More Options button, enter all the data shown below then click OK. With the group still selected go to Effect > Stylize > Drop Shadow. Enter the data shown below and click OK.
Step 9
Pick the Rectangle Tool (M), create a shape the size of your artboard and fill it with white. Enable the Grid (View > Grid) and the Snap to Grid (View > Snap to Grid). Now, you’ll need a grid every 15px. Go to Edit > Preferences > Guides & Grid, enter 15 in the Gridline every box and 1 in the Subdivisions box.
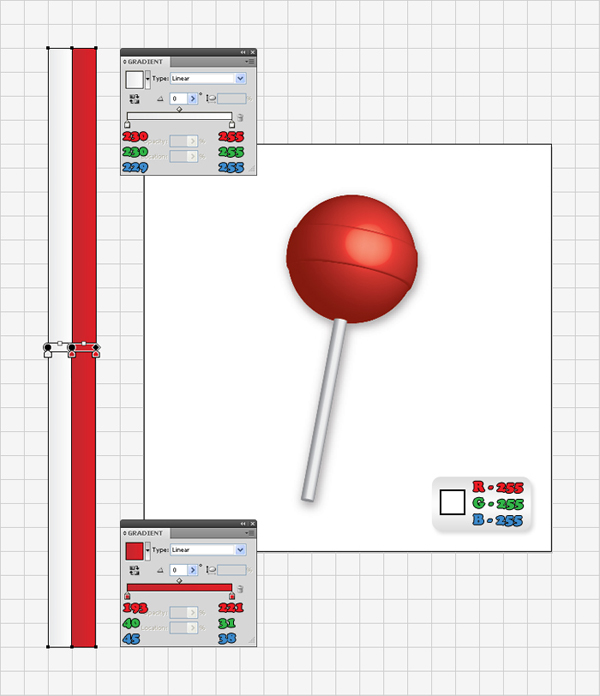
Reselect the Rectangle Tool (M). Create a 15 by 375px shape, fill it with the grey to white gradient and place it as shown in the following image (the Snap to Grid will ease your work). Duplicate it (Control + C > Control + F). Select this copy, move it 15px to the right and fill it with the other linear gradient. Select these two shapes and group them (Control + G).
Step 10
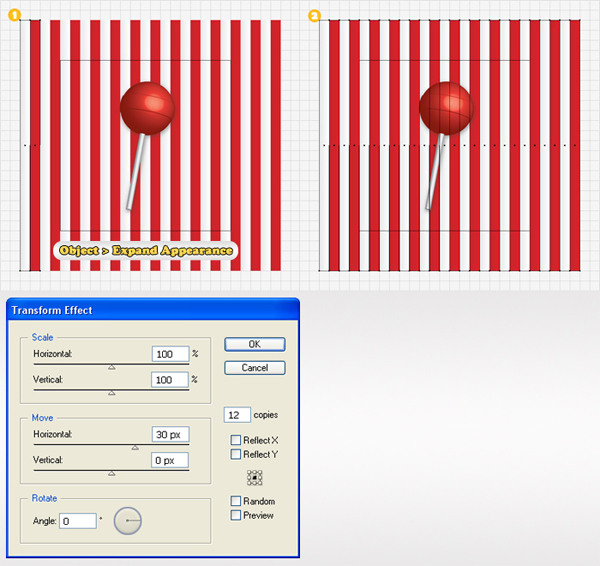
Select the group made in the previous step and go to Effect > Distort & Transform > Transform. Enter the data shown below, click OK then go to Object > Expand Appearance.
Step 11
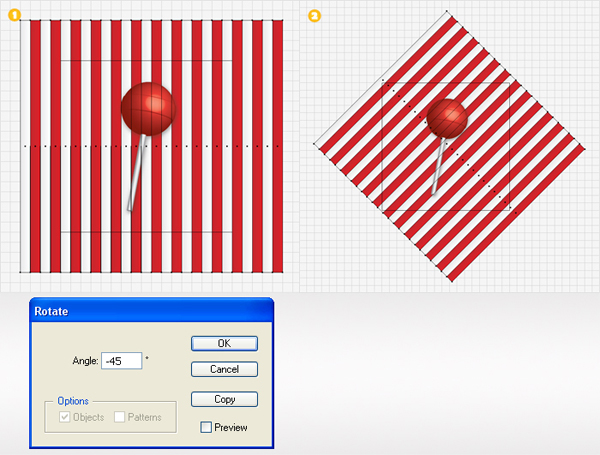
Select the group resulted from the previous step and go to Object > Transform > Rotate. Enter a -45 degrees angle and click OK.
Step 12
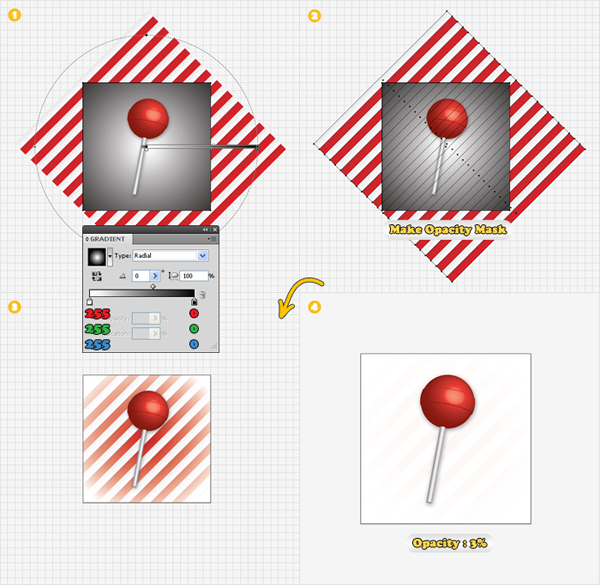
Finally, you need to mask the group of shapes from the previous step. First, open the Transparency panel. Create another shape, the size of your artboard and fill it with the radial gradient shown in the first image.
Select it along with the group, open the fly-out menu of the Transparency panel and click on Make Opacity Mask. Now, your group should look like in the third image. Finally, select this masked group and lower its opacity to 3%.
Conclusion
And there you have it. A lollipop icon from just a few simple shapes. Try experimenting with different colours and backgrounds to see what you can come up with. Have fun!
No comments:
Post a Comment